| Prev | Next |
Set Element Templates Package
In building up a model, you might want to represent or emphasize certain characteristics of elements in the appearance of those elements, or select particular display options as standard. For example, you could make new Interface elements a different default color to new Class elements, ensure all new Activity Partitions are vertical rather than horizontal, or set a specific group of display options for new Use Case diagrams.
To do this, you create an element or a diagram with all the characteristics you require, and store it in an Element Templates Package; the system then checks this Package:
- Whenever you create a new diagram, or
- Whenever you start to create an element using the Diagram Toolbox
When you are creating a new diagram, the system checks for the diagram type in the Templates Package and, if it finds that diagram type, will copy the display options of the template diagram into the new diagram.
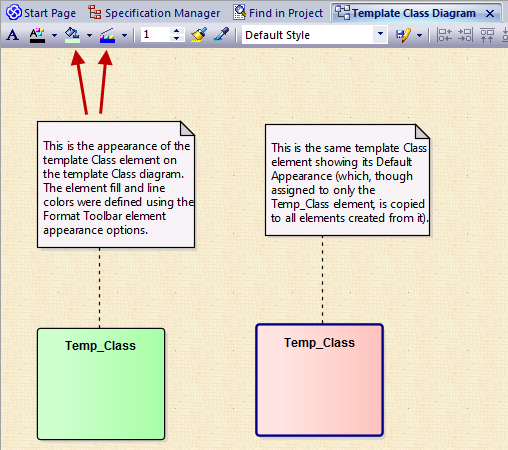
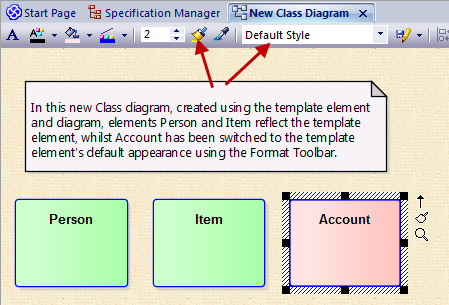
When you are creating a new element, the system checks for that element type in the Templates Package and, if it finds that element type, will copy the template element as defined. The definition includes any default display options of the template element, so you can apply the template definition and switch to the default appearance for the new element, if you prefer.
You can create the Templates Package anywhere in your model; however, it is better to create it in a location that is not likely to be accidentally changed or lost in any project development work.
Set up the Element Templates Package
Step |
Action |
See also |
|---|---|---|
|
1 |
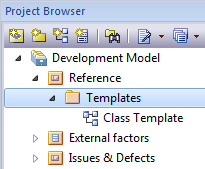
Create a new Package. 'Templates' is used as the Package name in the illustration, but you can give the Package any name you prefer. |
|
|
2 |
Within the Templates Package create new diagrams, one for each type of diagram to template. Give the diagrams easily recognized names; for example Class Template for the template for Class diagrams. |
|
|
3 |
Add elements to the template Package (each element must also appear on one, and only one, diagram), and configure the size, appearance, notes, version and other properties that you want new elements to have. You can use a standard UML element or a stereotyped element as the base for your template definition. |
|
|
4 |
Select the 'Configure > Reference Data > Settings > Project Template Package' ribbon option to set the templates as the default element templates. The Find Package window displays. |
|
|
5 |
Locate and click on the Templates Package, and click on the to set the Package as the default Element Template Package (you can set only one Package as the Templates Package at a time). Now each new element or diagram you add to your project is created with the settings from the appropriate template element or diagram. |
Notes
Learn more

