Move Elements Within Diagrams
As you add new elements to a diagram, you might want to move the existing elements to create more space, make a structure more apparent, or create a nesting relationship between two elements. There are several ways in which you can move the elements within the diagram.
Move Elements
|
|
|
|
Select an element or group of elements in the diagram, then:
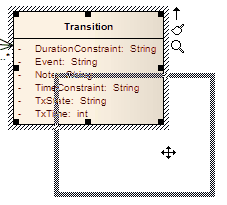
- Use the mouse to drag the element or group of elements to the required position (the cursor switches to the four-arrow icon as shown)
- Hold down Shift and press the appropriate arrow keys to move the element or group of elements by small increments in the arrow direction
If you are moving a single element and you have selected the 'Layout > Alignment >  > Smart Placement' and 'Show smart placement guide' options, as you move the element colored lines will display around the element. These indicate the positions of the edges and edge-centers as they align with an adjacent element or connector. > Smart Placement' and 'Show smart placement guide' options, as you move the element colored lines will display around the element. These indicate the positions of the edges and edge-centers as they align with an adjacent element or connector.
|
Move Elements In Diagram Sections
|

|
Select a group of elements in the diagram and align them on the last-selected element using:
- The 'Align...' options in the right-click context menu or
- The Alignment buttons on the Diagram toolbar

|
Operations on Multiple Elements
Diagram Toolbar
|
|
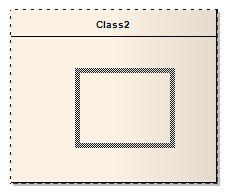
If you want to nest one element within another, you can drag that element onto the 'nest' element; the nesting element is then always encapsulated by the nest and moved within the nest.
Not all element combinations are valid. For example:
- Drag a Signal element over a Class; because a Class element can nest a Signal, the Signal element is encapsulated
- Drag a Class element over a Signal element; because a Signal cannot nest a Class, the Class element is not encapsulated
To confirm that the proposed nest element is able to accept the selected nesting element, observe the nest element border as you drag the nesting element over it:
- If the nest element can accept the selected element, the nest element border changes to a dashed line
- If the border does not change, the selected element cannot be encapsulated within the nest element
|
|
Notes (on Adding nesting element to nest)
- The 'Support for Composite Objects' checkbox must be selected on the 'Objects' page of the 'Preferences' dialog (select the 'Start > View > Preferences' ribbon option and click on the 'Objects' page); if this option is not selected, the dashed border does not show and the nesting element cannot be embedded on the nest element in the diagram
- Both elements must already exist on the diagram; the nest element border does not change if you drag a potential nesting element over it from the Toolbox or Project Browser
- The nesting element must be dragged right over the nest element, so that its borders are completely within the nest element borders
- The Z-order of the nesting element is automatically adjusted so that it is not hidden by the nest element
- When you embed a nesting element on its nest element, the nesting element becomes part of the nest element hierarchy in the Project Browser; if you drag the nesting element out of the nest element, the nesting element becomes independent and is no longer embedded in the nest element hierarchy
Learn more

