| Prev | Next |
Design Custom Document Templates
If you want to record and document details of your model, you can do so using a range of document reports, each generated using a document template. To meet your specific requirements, it is possible to customize the reports by developing your own templates; during this process you also have the option of generating test reports to review the output from your design as you develop it. The custom templates you can develop include full-document templates and independent Stylesheets, Cover Pages and Tables of Contents.
You create and edit report templates using the Document Template Designer to define:
- The model components to report on
- The information to extract on each component and
- The styles and layout of the report
It is possible to create a template from scratch or by copying and editing either another custom template or a system template. If you want to review the system templates you can list and display them using the Document Template Designer, and establish what templates already exist to either extract the information you require, or act as a starting point for your own design.
Access
When you open a template in the Document Template Designer, the Document - Edit ribbon also opens automatically.
|
Ribbon |
Publish > Tools > Document Templates |
|
Other |
Resources window | Document Generation | System Templates | <template group> : right-click on a template | Copy Resources window | Document Generation | User Templates | <template group> : right-click on a template | Open |
The Document Template Designer
The Document Template Designer consists of:
- A Toolbar, through which you create or select a template to work on, save your work, and generate and view the test reports
- A 'Sections' panel, on which you select the components of the model to report on
- A 'Content' panel, in which you develop the content and layout of the report, using an extensive range of context menu options
Toolbar Options
Icon |
Action |
See also |
|---|---|---|

|
Creates a new template. A prompt displays for you to enter the name of the new template and, optionally, the name of an existing template to use as a base. |
Custom Document Templates |

|
Saves changes to the current template. |
|

|
Saves the current template as a new template. A prompt displays for the new template name. |
|

|
Displays a range of document options that you can set to apply to all reports generated using the template. These options filter and organize the information presented in the report. |
Document Options |

|
Opens the Resources window and/or folder containing the currently-displayed document template, and highlights the template name. |
Resources |

|
Toggles the Document Generator view between showing the Sections hierarchy panel and hiding it. |
Setting Sections for Reporting |

|
Displays the Template Group name in which to locate or save the template; defaults to 'Model Templates'. Click on the drop-down arrow and select the appropriate Template Group name to search in. This filters the options in the next field to templates within that group only. For example, Cover Pages, or 'DavidG Reports'. |
|

|
Displays a list of the templates in the Template Group you specified in the previous field. To view or edit an existing template, click on the drop-down arrow and select the template name.
|
Custom Document Templates |

|
Displays the path and name of the file into which to generate the test report from the template. If no file path is shown, you can either type one in or use the |
|

|
Displays the 'Browser' dialog, in which you can locate and select the file to hold the generated test report. |
|

|
Generates and displays the test report based on the template. To generate a test report, you need to specify a target file (above) and select a Package, diagram or element in the Project Browser to run the report on. You could develop a special test Package for this purpose. |
|

|
Displays the report held in the file specified in the file path field. You can return to a generated report many times whilst you review the effects of different sections of the template you are editing. |
 button.
The Sections and Content Panels
Facility |
Description |
See also |
|---|---|---|
|
Sections Panel |
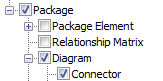
Consists of a hierarchy of model components and their properties, each with a checkbox. To include information on a type of component in the report, you select the checkbox against it. As you select checkboxes, corresponding pairs of open/close markers display in the 'Content' panel; for example: Sections Panel Content Panel |
Setting Sections for Reporting |
|
Content Panel |
The editing area, in which you develop the structure and content of the template. As you add section markers to the template, text containing hints is automatically added to provide guidance between the markers, such as:
Replace the hint text with a range of fields (that extract information from your model) and static text that is manually entered. |
Add Section Content |
|
Editing the template |
Most of the work you do in creating and updating a document template is accomplished using the facilities of the 'Document - Edit' ribbon, which is automatically displayed when you open the Document Template Designer. For guidance in using these facilities, you can refer to either:
|
Custom Template Design Options Editing Documents and Templates Document Edit Ribbon |
|
Content Panel Context Menu |
If you right-click on the field marker text or background of the 'Content' panel a context menu displays, providing a number of additional options to:
|
Project Constants Report Constants The Normal.rtf Style Template Notes on Creating Stylesheets Custom Template Design Options Custom Template Design Options |


Notes
Learn more

