| Prev | Next |
Install Joomla! Locally
Before you can publish model contents as Joomla! Articles, you must install Joomla! locally on your workstation.
There are three stages in the process of installing Joomla! locally:
- Download and install software that Joomla! requires to run locally
- Download and install Joomla! itself
- Configure Joomla! and create a MySQL repository into which to publish the Articles
Stage 1: Download and install software that Joomla! requires to run locally
Step |
Action |
|---|---|
|
1 |
Joomla! depends on these software applications to run locally:
If you do not already have these applications, you must install them on your workstation. To do this, you can use a solution package such as XAMPP, which you can download from this site. The instructions for installing XAMPP are available here. |
Stage 2: Download and install Joomla!
Step |
Action |
|---|---|
|
1 |
In the xampp\htdocs folder, create a folder for the Joomla! installation (so, if you have installed XAMPP in the default location then create the folder under c:\xampp\htdocs). Give this folder a suitable name. Note - this folder name will be used as the Joomla! Repository name in the MySQL database in Stage 3. |
|
2 |
Download the Joomla! Full package from here. |
|
3 |
Unzip the contents of the downloaded .zip file into the Joomla! folder you created in Step 1. For detailed instructions on installing Joomla! locally, refer to the section Download and install Joomla!. |
Stage 3: Configure Joomla! and create a MySQL repository in which to publish Articles
Step |
Action |
|---|---|
|
1 |
Check that the Apache and MySQL modules are running in the 'XAMPP Control Panel'. |
|
2 |
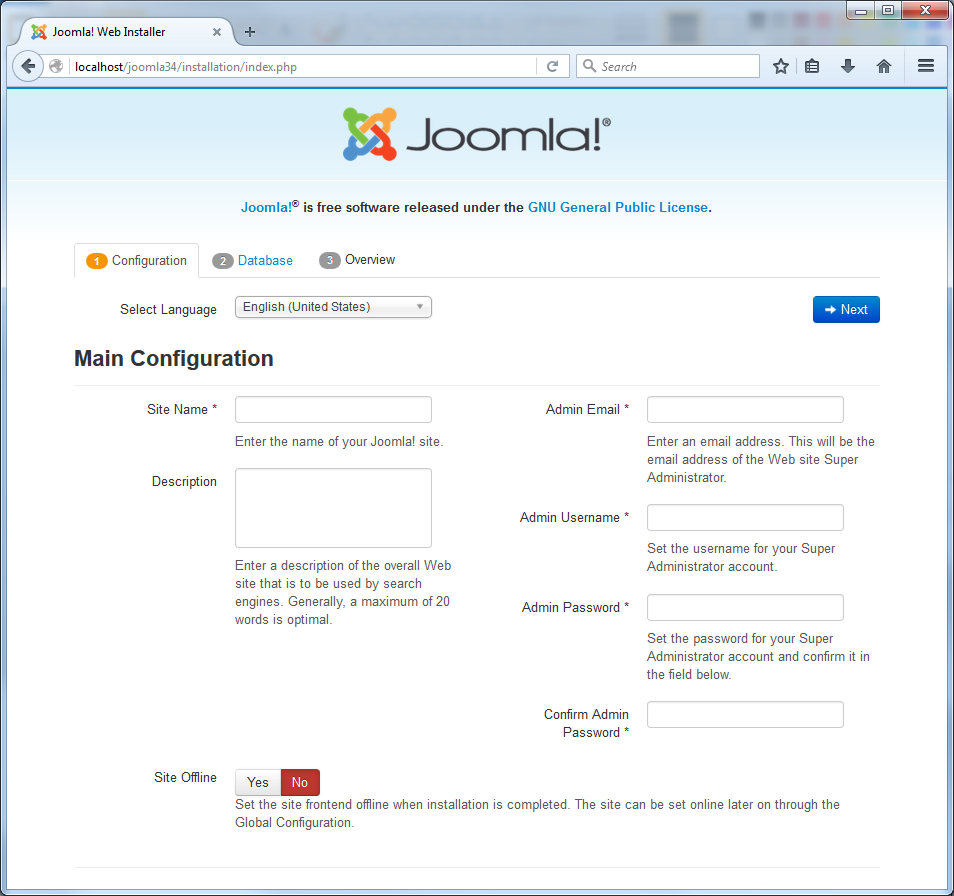
Open a web browser and type in the URL: http://localhost/<joomla_folder_name> where <joomla_folder_name> is the name of the Joomla! folder that you created in Stage 2. The Joomla! Web Installer page displays.
|
|
3 |
Complete all the required fields on the 'Main Configuration' tab, and click on the . The 'Database Configuration' tab displays. |
|
4 |
Complete the fields on the 'Database Configuration' tab as shown:
Click on the ; the 'Finalization' tab displays. |
|
5 |
On the 'Finalization' tab, in the 'Install Sample Data' section, select the 'None' option. Click on the to initiates the Joomla! repository creation process. |
|
6 |
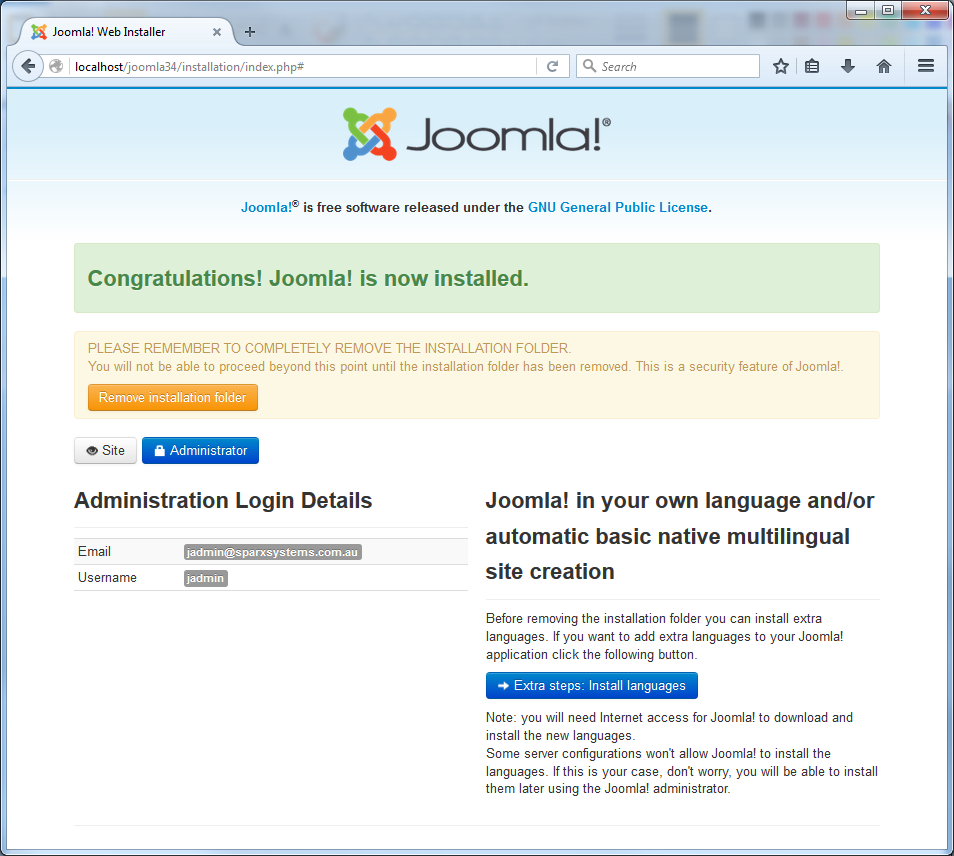
When the Joomla! repository installation is complete, the 'Congratulations' and 'Administration Login Details' panels display.
|
|
7 |
Click on the , and then on the . This opens the Joomla! site, which is now ready to receive the Articles that you create. |
Notes

